nginx+Hugo 搭建博客
Hugo 安装
Hugo 是一款 Go 语言开发的静态网站的框架,非常适合搭建博客。
Hugo 的安装非常简单,官网有一个简洁的 quick start。
-
可以安装 Go 环境,然后下载源码编译安装;也可以下载二进制包等方式。hugo 命令建议放到环境变量下,方便后续服务启动等。
-
创建站点,搭配个主题样式
hugo new site 站点目录名字如quickstart
cd quickstart
git init
git submodule add https://github.com/theNewDynamic/gohugo-theme-ananke themes/ananke
echo "theme = 'ananke'" >> config.toml
ananke 样式如果 git sub 失败的话,可以去github站点去下载zip包,再放到 themes目录下也是一样
-
发布文章
文章写到 content 目录下,支持 markdown 格式,如:
--- title: "MySQL Post" date: 2021-02-27T00:00:00+08:00 tags: ["mysql"] --- ## title xxxxxx -
启动 hugo 服务
默认是 1313 端口。服务启动时支持参数,如我的博客使用了 baseURL、appendPort,用这参数是因为用了 nginx
# 简单
hugo server -D

# 我的博客的启动
nohup hugo server --baseURL https://hansongda.cn/ --appendPort=false -D &  2>&1
# 杀死
kill -9 `ps aux | grep hugo | grep server|awk '{print $2}'`
ananke 主题修改
我用的 ananke release v2.8.0,这里展示站点description 有个bug,增加个 .Site
vi ...themes/ananke/layouts/partials/site-header.html
 {{ with .Site.Params.description }}
  <h2 class="fw1 f5 f3-l white-80 measure-wide-l center mt3">
    {{ . }}
  </h2>
{{ end }}
NGINX 安装
我的博客站点用 NGINX 主要是:
- 服务器上还有其他 LNMP 服务
- 站点 https 的处理
- 静态文件的 cache,用 nginx 做了博客文章的图片缓存
- 反向代理 hugo 后端服务
nginx 安装也比较简单,如果不是非要指定版本,也不建议源码包。直接 yum 或者 apt-get 等方式安装即可。
配置文件
nginx 使用上,我们主要是变更配置文件 nginx.conf
worker_processes 4;

events {
  worker_connections 1023;
}

http {

  # 缓存静态文件
  proxy_cache_path  /home/work/testimgcache levels=1:2 keys_zone=blog-cache:200m max_size=1g;

  # 省略了一些信息...

  server {
    listen 80;
    server_name  www.hansongda.cn;

    # http访问跳转到 https
    rewrite ^(.*) https://$server_name$1 permanent;
  }

  #HTTPS server
  server {
    listen 443;
    server_name www.hansongda.cn;

    # 省略ssl 的配置信息...

    root /home/work/xxx/blog;

    location ^~ / {
      proxy_set_header X-Real-IP $remote_addr;
      proxy_set_header Host $http_host;
      proxy_pass http://127.0.0.1:1313;

      # add nginx cache
      proxy_cache blog-cache;
      proxy_buffering on;
      proxy_cache_key $uri$is_args$args;
      client_body_buffer_size 10M;
      client_max_body_size 10G;
      proxy_read_timeout 300;

      proxy_ignore_headers X-Accel-Expires Expires Cache-Control Set-Cookie Vary;
      proxy_hide_header Set-Cookie;
      proxy_hide_header Cache-Control;

      # debug很久,有这个就不miss了。。https://www.nginx.com/blog/nginx-caching-guide/
      proxy_cache_valid any 365d;

      add_header X-Proxy-Cache $upstream_cache_status;
    }

  }
}
https ssl证书
listen 443;
server_name www.hansongda.cn;
ssl on;

ssl_certificate hansongda.cn_bundle.crt;
ssl_certificate_key hansongda.cn.key;

ssl_session_cache shared:SSL:1m;
ssl_session_timeout 5m;
ssl_protocols TLSv1 TLSv1.1 TLSv1.2; #按照这个协议配置
ssl_ciphers ECDHE-RSA-AES128-GCM-SHA256:HIGH:!aNULL:!MD5:!RC4:!DHE; #按照这个套件配置

ssl_prefer_server_ciphers on;
- cloud.tencent 申请免费证书,并下载密钥文件
- 上传到nginx对应配置目录,并重启nginx,参考文档
github 评论插件安装
虽然是静态的博客站点,当然也得需要评论区。有一个简洁(侵入性很低)且无广告的插件 utteranc 很不错,其利用的 github 的 issue 功能。
其原理也比较简单,这里描述下:
- 建一个 github 仓库,并授权访问给 utteranc
- 发布评论须使用 github 账号登录,并授权给 utteranc
- 发布评论,utteranc 根据 博客id + 评论信息 提交到你的github 仓库对应的 issue
- 展示评论,utteranc 也是利用github 提供的 issue search API,然后拼出来该篇博客的评论内容
集成到博客
该插件侵入性很低,只需要把 script 放到博客 html 模板下即可。
步骤
- 在utteranc站点 授权
- script 中填写授权的 github 仓库
- 选择博客id,为了在 issue 中存取评论
- 选择主题样式
可以配置化,也可以直接写死在 script 代码里
vi .../themes/ananke/layouts/_default/single.html
{{ if .Site.Params.utteranc.enable }}
<script src="https://utteranc.es/client.js"
repo="{{ .Site.Params.utteranc.repo }}"
issue-term="{{ .Site.Params.utteranc.issueTerm }}"
theme="{{ .Site.Params.utteranc.theme }}"
crossorigin="anonymous"
async>
</script>
{{ end }}
config.toml 文件增加配置:
## 配置 utteranc评论,教程参考 https://utteranc.es/
[params.utteranc]
  enable = true
  repo = "github-custom-repo"
  issueTerm = "title"
  theme = "github-light"
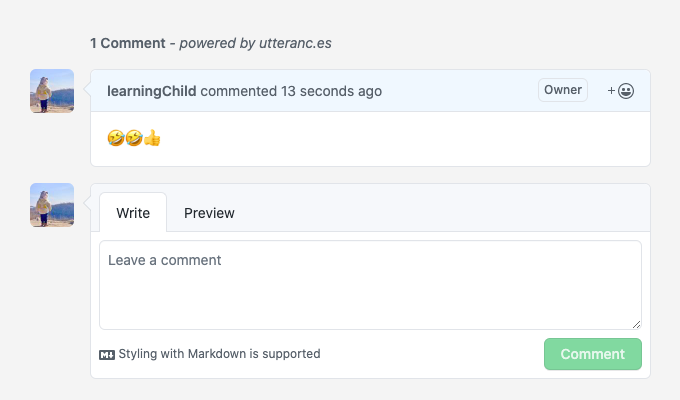
效果
其他
增加标签展示
ananke 默认样式里,标签栏 缺少一个整体展示所有标签的位置。根据源代码,我自己优化了下,并且美化了 a 标签:
文件位置
vi .../themes/ananke/layouts/_default/terms.html
{{ define "main" }}
    {{ $data := .Data }}
  <article class="cf pa3 pa4-m pa4-l">
    <div class="measure-wide-l center f4 lh-copy nested-copy-line-height nested-links {{ $.Param "text_color" | default "mid-gray" }}">
      {{ .Content }}
    </div>
  </article>
  <div class="mw8 center">
    <section class="ph4">
<style>

.aaa {
    display:inline-block;
    margin:6px 6px 6px 6px;
    padding:6px 8px;
    font-size:16px;
    outline:none;
    text-align:center;
    cursor: pointer;
    border-radius: 1000em;
    text-decoration:none;
    color: #fff;
    background: #6d99d3;
}

.aaa:hover {
    background-color: #b79cd0;
}

.aaa:visited {
    color: #fff;
    text-decoration: none;
}

</style>
      {{ range $key, $value := .Data.Terms }}
          <a href="{{ "/" | relLangURL }}{{ $.Data.Plural | urlize }}/{{ $key | urlize }}" class="aaa">
             {{ $key }}
          </a>
      {{ end }}
      {{ range $key, $value := .Data.Terms }}
        <h2 class="f1">
          <a href="{{ "/" | relLangURL }}{{ $.Data.Plural | urlize }}/{{ $key | urlize }}" class="link blue hover-black">
            {{ $.Data.Singular | humanize }}: {{ $key }}
          </a>
        </h2>
        {{ range $value.Pages }}
          {{ .Render "summary" }}
        {{ end }}
      {{ end }}
    </section>
  </div>
{{ end }}
效果

检索功能
todo
虽然是静态的博客站点,也得弄个检索功能,否则想找某一篇博客还是比较困难。类似评论插件,检索也有公开的插件。有时间把这个加上 :)